![]()
3G GPS Tracker:
Tips, Tricks, Updates & Help
Hopefully you will be able to solve your issue here, and learn more about using your Tracker. We’ve tried to be as thorough as possible to help as many customers as we can – so you might have to scroll carefully to find the solutions that are relevant to your needs.
Download an easy-print version of the 3G Stray Star Tracker by clicking here. Or right click on the link and select “save target as” – then choose a place to save it. Please note this is only for the 3G version of the device (US, Canada, Australia and New Zealand).
The downloadable manual above is specifically for the 3G Stray Star Trackers and may be slightly different to the one in your package in terms of how authorized numbers work. A reminder of the 3G authorized number set up is below.
The only other difference between the e-manual over the print one is that the “Name your GPS Tracker for reply texts” and “Change the Time Zone” functions (see headings below) are also included.
A1,phonenumber – sets first authorized number
A2,phonenumber – sets second authorized number and outgoing call numnber (for side button)
A3,phonenumber – sets third authorized number
A4,phonenumber – sets fourth authorized number
A5,phonenumber – sets fifth authorized number
To delete, send A1, to delete the first authorized number
A2, to delete the second authorized number
A3, to delete the third authorized number
A4, to delete the fourth authorized number
A5, to delete the fifth authorized number
All authorized numbers will receive low battery alerts, geo-fence alerts, SOS alerts and fall alerts. They will also be called in turn, if the SOS is pressed.
Battery Management
Text Mode4 to your Tracker to activate this battery mode.
You will receive a reply with “Press button to active GPS working mode on!”. From now on, the GPS chip will be “asleep” unless the wearer presses a button (e.g. SOS) or someone texts it (e.g. for a location). Because it won’t be locating regularly locating itself whilst on the move, your battery should now last up to 10 days (possibly more) instead of the usual 3-4.
If you wish to test whether Mode4 is active, just shake the device in your hand. If the blue LED comes on in response to this, then it isn’t active, its either in the default PS1 mode or DS1 (deep sleep) mode. If the blue LED doesn’t come on, but the green LED is still blinking as usual, then its in Mode4. Of course, always send a location request via Loc just to satisfy yourself that the GPS chip still wakes when you need a location.
You can also check to see if Mode4 is active by texting Status. If you see
PS:0
DS:0
then Mode4 is active.
If you see
PS:1
DS:0
then PS1 mode is active.
Should you ever wish to cancel Mode4, you can text PS1 to go back to the default mode (where any motion will wake the GPS chip).
Disadvantages to using Mode4
Mode4 extends the battery life by deactivating the motion sensor – which normally activates the GPS when the device moves to keep it ready-and-waiting. Therefore, if using Mode4, you should be aware that functions like geo-fencing, online tracking, fall detection or motion sensing won’t be as effective. If you’re using these functions, the PS1 (normal power-saving mode) or DS1 (deep sleep mode) are the best options.
When you “wake” the GPS again with a location request, its like turning the device on for the first time. It can take a few minutes to acquire a good signal – so your device may instead respond with an older location with a past date/time stamp. If you get an old location (which you can see from the time given in the location text), try again a minute or so later. Think of it like this – the first text wakes the device up, then the second text gets a better location.
You may still not get an accurate signal, particularly if the device is indoors. If you still can’t get a signal, as a last resort text REBOOT to “restart” the device. This won’t affect your settings bu will give the device a fresh “push” to lock onto the satellites.
If the disadvantages are an issue – consider the compromise option of Deep Sleep mode
Another battery option is DS1,30M. This will put the device into deep sleep (where texts or calls are not received), until the device moves. When it does, it will then stay on for 30 minutes. This means that if the person wearing it walks away and becomes lost, it will activate until it becomes stationary again, and then for thirty minutes after that, allowing you to locate them. The advantage is that when the device is not moving for more than thirty minutes (e.g. overnight) it will be in the lowest energy setting (where no texts or calls can be received), thereby prolonging the battery life.
The disadvantage to DS1 is that your texts or calls won’t be received whilst the device is sleeping. But it only sleeps when its been stationary for more than 30 minutes, so this shouldn’t be too much of an issue. If the person moves or wanders, the device will activate.
If you need to change the “window of activation” from 30 minutes, just adjust the number in the command. For example, DS1,15M for 15 minutes (even longer battery life), or DS1,60M for an hour.
You can also check to see if Deep Sleep mode is active by texting Status. If you see
PS:0
DS:1
then Deep Sleep is active.
Of course, the device will need to be woken with movement, for you to receive a reply text.
Should you ever wish to cancel Deep Sleep, you can text PS1 to go back to the default mode (where the device is always awake to texts and calls, but any motion will specifically wake the GPS chip).
If you’re using
– geo-fencing
– online tracking
– fall detection
– motion detection
then the motion sensor of your device will need to remain active. In this scenario, the PS1 energy setting is the best choice.
Another battery option is DS1,30M. This will put the device into deep sleep (where texts or calls are not received), until the device moves. When it does, it will then stay on for 30 minutes. This means that if the person wearing it walks away and becomes lost, it will activate for thirty minutes allowing you to location them. When not moving for more than thirty minutes (e.g. overnight) it will be in the lowest energy setting (where no texts or calls can be received), thereby prolonging the battery life.
More Useful Functions
Text name1,[user name] to the Tracker – e.g. name1,dads tracker. It will then put “DADS TRACKER” at the top of all the reply text messages. If you want to remove the name, just text name0.
You can use a space in this command (as in the example), and its not case sensitive. The name will be converted to upper capitals in the reply text message.
Useful if you’re going abroad, or want to adjust for daylight savings time. This adjusts the time relative to GMT that you see in the text messages, for locations etc.
Text TZ+01 to push the time zone forward by one hour, TZ-01 to go back an hour, TZ+05 to go forward 5 hours – you get the idea.
The device can use something called assisted GPS (AGPS) – which can significantly improve how fast the Tracker locks onto the satellites. It also allows for even more precise locating.
To enable this, first send Loc to get a location. Then send AGPS1,xx.xxxxxx,xx.xxxxxx where the x’s represent the coordinates from your Loc text. The coordinates just need to be for the country you are in. Make sure there are no spaces. It doesn’t reduce the battery, so this is one tip that’s definitely worth doing.
If the Tracker is deep indoors, you can still get an approximate location.
By texting CL1, you will get “Cell locate on!” by reply. The Tracker will now locate itself using the cell network base station tower, if the GPS signal isn’t available. Please be warned though – this can give a very approximate location – using base station towers to triangulate the location is nowhere near as accurate as the GPS location. Its just useful as a back up should you need it.
To cancel again, text CL0 (as always, that’s a zero to cancel, not the letter O).
Texting LED1 will turn off the three LEDs. The Tracker will look like its switched off, but is working just the same as when switched on – so please warn the wearer that this is intended!
In another scenario, this might be useful if the wearer doesn’t like the flashing lights.
To switch the LEDs back on again, text LED0.
This function is really only specific if you are tracking a vehicle, perhaps that an employee is using.
Texting speed1,100 will alert you if the vehicle travels over 100 km/h. The number is variable, but must always be three digits. If you’re used to mph, you will need to convert the speed limit to km/h first.
To cancel again, speed0.
If you get yourself into a royal muddle with functions and don’t know whether you’re coming or going – then you might want to reset the device and start again. The command is RESET!
You will need to resend any programmed phone numbers and/or functions, as well as AGPS – see “Improve the GPS signal…” above for more info).
Usage Issues
If you’ve only recently started using your device, then give it time to lock onto enough satellites. It helps to leave it on a window ledge for a while, just after switching it on. Over time, the speed to GPS signal will increase, because it will remember the satellites and where they are.
If after an hour you’re still getting no GPS signal, put it on a window ledge and text reboot to it. This will have the effect of switching it off and then on again – it won’t lose your settings, but just allow a fresh reboot to lock onto the satellites again.
You may also not get a signal whilst the device is charging.
Use the AGPS function for increased strength
The device can use something called assisted GPS (AGPS) – which can significantly improve how fast the Tracker locks onto the satellites. It also allows for even more precise locating.
To enable this, send AGPS1, followed by coordinates for your country. It doesn’t reduce the battery.
Locate using the Mobile Mast Tower
If the Tracker is deep indoors, you can still get an approximate location.
By texting CL1, you will get “Cell locate on!” by reply. The Tracker will now locate itself using the cell network base station tower, if the GPS signal isn’t available. Please be warned though – this can give a very approximate location – using base station towers to triangulate the location is nowhere near as accurate as the GPS location. Its just useful as a back up should you need it.
To cancel again, text CL0 (as always, that’s a zero to cancel, not the letter O).
You must be making a mistake with your text!
Make sure there are no spaces. If you are getting the FORMAT ERROR response to a simple LOC text, it is likely that you or your phone is placing a space before or after the three letters. ” LOC” or “LOC ” will result in a FORMAT ERROR response.
We’ve seen it where someone’s mobile phone was adding extra characters to the end of all their text messages (like an auto-signature), leading to constant errors. If you want to rule out this scenario, send the text from a different mobile phone instead.
Double check what the text should be – look carefully for any commas. Some functions have a minimum of three digits for distances, so a 50M geo-fence would be G1,1,0,050M rather than G1,1,0,50M.
Sometimes when customers get in touch with a problem like this, they assure us they’re sending it correctly. Yet when we send the text ourselves, the response invariably comes back fine. It then turns out that they’ve added a space, an extra comma, an extra digit somewhere! So please double check.
If you’re absolutely stuck and can’t get a text command to work, contact us via the form below and write the EXACT text as you’re sending it, along with the phone number for the Tracker so we can try for you.
When the device is charging, the GPS chip won’t be as able to retrieve an accurate location – added to which the device is indoors anyway. For this reason, you are likely to get an old date/time stamp in location reports, if the device is charging.
The battery level report in response texts won’t be accurate either – it may show 100% battery even if the device is still charging.
Please remember that charging isn’t complete until the blue LED on the device itself is no longer constant. If using a charging cradle, the red LED on the cradle will also dim.
Sometimes the device won’t be able to acquire the current location, due to a poor GPS signal (e.g. if indoors).
If this is the case, the timestamp in the text may show an old time – this is when the location was last acquired.
The device will become more accurate the longer it is left on – as it will have more time to acquire the locations and IDs of all the passing satellites.
If you notice that the location coordinates are exactly the same as the last location, but the time is showing as now, then you can text Reboot to the device. This will act like switching it off and on again, allowing it to have a fresh search for the satellites to lock onto a signal. This shouldn’t happen often.
If it still happens, the device may have crashed. In this rare occurrence, send b>Reset! then re-authorize your numbers.
Are you sure that you set your number accurately? Text the device with status to check on the numbers. Make sure there are no spaces – the phone number should follow directly after A,B,C,D or E without a space.
Even if you get a “Set number 1 OK!” reply back to your “A1,[phone number]” text, you may have still made a mistake in your text. It will always reply back automatically to the phone that sent the text – which isn’t necessarily the phone number that you are setting to be the A1 number. For example, you could use the same mobile phone to set all five numbers for various carers, with different phone numbers.
The next thing to check is SIM credit. Log into your phone network account, to check that you still have credit left!
You get no text alerts, but you do get a location reply when sending ‘Loc’
Your number isn’t programmed into the device in the slots A1 to A5.
You get no text alerts, no location response, but the Tracker rings if you call it
Is the SIM in the Tracker is out of credit? Are you sending the commands properly, i.e. without any spaces? Check from another phone – once in a while it seems particular phones block texts from other devices (perhaps the device phone number has been accidentally blocked?)
You get no text alerts, no location response, and calling it goes straight to voicemail
The Tracker is switched off, the SIM has been removed, or there is no network signal for the Tracker’s SIM.
You get no text alerts, but you do get a location reply when sending ‘Loc’
Your number isn’t programmed into the device in the slots A1 to A5.
You get no text alerts, no location response, but the Tracker answers if you call it
Is the SIM in the Tracker is out of credit? Are you sending the commands properly, i.e. without any spaces? Check from another phone – once in a while it seems particular phones block texts from other devices (perhaps the device phone number has been accidentally blocked?)
You get no text alerts, no location response, and calling it goes straight to voicemail
The Tracker is switched off (a possible charging issue? See the relevant section below), the SIM has been removed, or there is no network signal for the Tracker’s SIM.
The red commands in the manual form the content of text messages, which you need to send to the Tracker SIM’s phone number. The red command should be the only content of the text message. The Trackers phone number is a cell phone number that is associated to the SIM inside of it.
For example, if you were wanting to set up the phone number 2125557382 as an alert number, you would send A1,2125557382 as the content of a text message, to the Tracker’s phone number.
(You wouldn’t send the text message to “A1,2125557382” as a recipient, because that makes no sense! “A1,2125557382” is the content of the text message.)
So for a location, just send “LOC” as a text message, to the Tracker’s phone number. Its really easy!
You must be making a mistake with your text! Double check what the text should be – look carefully for any commas. Some functions have a minimum of three digits for distances, so a 50M geo-fence would be G1,1,0,050M rather than G1,1,0,50M.
Make sure there are no spaces.
Sometimes when customers get in touch with a problem like this, they assure us they’re sending it correctly. Yet when we send the text ourselves, the response invariably comes back fine. It then turns out that they’ve added a space, an extra comma, an extra digit somewhere! So please double check.
Once there was a case where someone’s mobile phone was adding extra characters to the end of all their text messages (like an auto-signature), leading to constant errors. If you want to rule out this scenario, send the text from a different mobile phone instead.
If you’re absolutely stuck and can’t get a text command to work, contact us via the form below and write the EXACT text as you’re sending it, along with the phone number for the Tracker so we can try for you.
As the numbers A1 to A5 all receive normal alerts as well as SOS alerts, unfortunately there is no way to disable the SOS button without also losing alerts. This is a function that is available with the 2G device, but not currently possible with the 3G.
Unfortunately, the Tracker automatically answers all calls, after a loud call-jingle sound. There is no way to prevent calls. Hopefully, you have a new SIM with new phone number for the sole use of being inside of the Tracker, so you won’t be getting unwanted calls.
If you’re using an old SIM which people might still call, or you give the phone number of the Tracker out to people who might decide to call it, then unfortunately you’re going to be stuck with this problem. The only real solution is to get a new SIM.
This is assuming you have correctly followed the steps on the online tracking tutorial to get it working properly.
Send G1 to check your online tracking settings. Visit this page again to send the correct texts to get it set up.
If, in the response from G1 you see S,0, then this tells you that the online tracking has been switched off. Send S2 to switch it back on again (this is assuming that the APN, IP and port settings are still correct).
After a few minutes, you should see the locations appearing again in your online tracking account.
Geo-Fencing
 Things to be aware of:
Make sure the command is accurate
The command to be alerted if the Tracker leaves a 100 meter fence is G1,1,0,100M. Make sure you use zeroes (the number) and not O (the capital letter). If you do, e.g. G1,1,O,100M then you may still get a successful response back, but the function will now alert you if the device is INSIDE the boundary, not outside (so you’ll get an immediate alert text).
If you want to set a one kilometer fence, the command would be G1,1,0,001KM, and NOT G1,1,0,1KM. It needs a minimum of three digits for the distance.
Drifting
 GPS accuracy can reduce if the device is indoors, especially if its charging, nighttime, near big/tall trees, or if its raining or very cloudy. This is because in certain moments (sometimes only lasting seconds) it can’t lock onto as many satellites as it needs to get an accurate location. The area of inaccuracy can be as wide at 100M, but only in sudden moments.
This is why we recommend a minimum of 100M, to avoid false alerts. You can experiment with a smaller geo-fence (e.g. G1,1,0,065M) but be aware that you might get false alerts.
Because of drifting, make sure the Tracker is where you think it is, before setting a geo-fence
If the device is indoors, and you send a geo-fence command, once in a while its possible that at that very moment, the location is slightly inaccurate. Lets say it (wrongly) thinks its 40 meters to the west of the house. If you set a 100m fence, that now means that you’ll get an alert if the device goes 140m west, and only 60m east of the house. Hopefully you can see why that would be the case.
So to ensure that the device isn’t drifting when you send the geo-fence command, send an Loc location request beforehand, to make sure its where it should be. Better still – take it into the garden, or on a windowledge, before sending the Loc command, make sure its where it should be, then send G1,1,0,100M.
If you do still get false alerts when the device is indoors, you might want to make the geo-fence a little bigger. Remember that when its outdoors, the accuracy is much better.
Consider using IN-TO zones, rather than an OUT-OF zone
If the person you’re tracking tends to take predictable routes when wandering – e.g. either up to one road, or down to another – then you could consider a geo-fence (or two geo-fences) that alerts you if they walk IN TO an area, rather than OUT OF one. If they live in the middle of a street for example, you could set two smaller (e.g. 50m) circular geo-fences that cover each end of the street. To do this, you would need to take the device to its “danger” zone, send Loc just to be sure, then G1,1,1,050M to set a 50m ‘in to’ zone. Then, if you do the same with the other end of the street, the command would be G2,1,0,050M (second geo-fence). You will get an instant alert as you’re already inside the zone, but that’s ok, when you step out of it the function will be ready to alert you next time. Of course, you’ll need to manage the zone sizes based on how far they are from the house – you don’t want any overlap or else you’ll get false alerts.
Make sure AGPS (Assisted GPS) is on
AGPS boosts the GPS lock-on time, and should help with drifting. Its worth switching AGPS on again, just in case this function isn’t active on your tracker (it is by default, but your device may have been reset). To do this, first send a “loc” command to get a location (the actual location doesn’t matter, as long as its still in the same country). In the following example, I’ve used a made up coordinate – replace it for your own: AGPS1,52.372843,0.348294. For the UK, AGPS1,52.000000,-1.000000 is good enough (it just needs to be somewhere in the country of use for AGPS to be active).
Please read the “More Detailed Guide” above, which may help you understand why this might be the case and how to solve it.
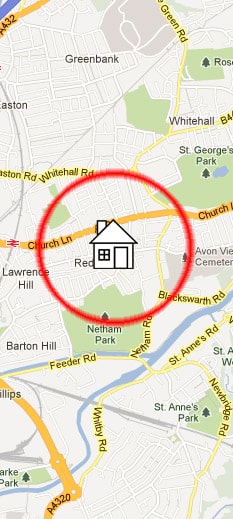
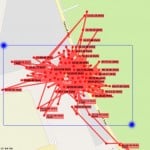
If you get a false alert, click on the location link to see where it thinks it is. Zoom in on Google Maps if you need to, to make absolutely sure you can see this location clearly.
This location should be same distance away from the house (or central location) as the distance you set in your geo-fence. If it isn’t, then the chances are that the center of your geo-fence is not where you think it is. If you collect enough false-alert locations, you should see a circle develop on the map which approximates your geo-fence. It might help to follow the advice in the “More Detailed Guide” above to ensure the geo-fence is in the right location.
If it is in the right location, and the alert is a result of drifting, then you should consider making the zone a little bigger.
Please read the “More Detailed Guide” above, just so you’re more aware of this function.
Is the alert number set correctly?
If you press and hold the SOS button – do you get an SOS text alert (and call?) If not, then your alert numbers aren’t set properly. Send status to check your alert numbers (A1, A2, A3, A4, A5). There should be no spaces between the letter and the phonenumber, and the phonenumber should of course be accurate.
Is the function working correctly?
As a test, send G1,1,1,100M to set an “in to” geo-fence. You should get an alert back within a few minutes (as you’re already inside the zone). If you don’t, then its likely there is an issue with your alert numbers, credit on the SIM, or there is a location problem. If you do, then send G1,1,0,050M to set a 50 meter ‘out of’ fence, and keep walking until it triggers. You can then be reassured that the function is working, and increase the zone until you’re happy with it.
Geo-fencing (e.g. G1,1,0,100M) will create an imaginary circle of a set radius, to act as your “zone”. The device will then alert you when it leaves (or moves into) that zone.
If a geo-fence alert is triggered, it will be automatically reset when the device moves back into the safe-zone – so it can alert you again once it moves back out. You don’t need to keep re-sending the command.
The movement function (e.g. M1,100M) keeps an eye on how far the device has moved – which may not necessarily be in a straight line.
If the movement function alert is triggered, the function is then cancelled. You will need to resend the command again. Its different to geo-fencing because the movement function “start” is set by when you send the command (wherever the device happens to be). Once it’s triggered, it no longer knows where the start should be, until you resend the command.
Charging Issues
If follow these guidelines, you should find that your battery stays healthy for years. Obviously they won’t always be practical depending on your situation, so don’t feel you need to go out of your way to stick to them – but they will help the overall longevity of the battery.
Perform shallow discharges.
Instead of letting the battery drain to 0% all the time, the battery will perform best if it drains to about 40-60% before charging. Discharges to 50% are better for your battery’s long-term life than, say, small discharges to 90% or large discharges to 0% (50% discharges provide the best number of cycles-to-usage ratio).
Try not to leave it charging, when fully charged.
You don’t need to leave it on overnight as if it will somehow “really make sure” its fully charged. As soon as the blue LED on the device is no longer constant (i.e. its now flashing) or the red light on the charging cradle dims, then remove it from charging.
Fully discharge it once a month.
This may seem contradictory, but hear us out. While the battery shouldn’t be heavily discharged regularly, fully discharging your battery once a month will help make sure the reported battery level stays accurate.
Keep it cool.
Excess heat is not only bad for the device’s processor, but the battery as well. A hot battery will degrade in health much quicker than a cool one. Where customers accidentally put their Trackers through a washing machine, it wasn’t the water that caused damage (they’re waterproof) but heat damaging the battery. Try not to leave them on car dashboards, in front of old windows (which can have a convexed lens effect), near radiators etc.
If you feel you need a replacement battery
Try discharging and fully recharging your battery to ensure that its reporting on battery levels correctly, and test how long you’re getting out of it. Your battery life should reflect the battery mode you’re using, as well as how many functions you’re running (e.g. geofencing, online tracking). Please remember that charging isn’t complete until the blue LED on the device itself is no longer constant. If using a charging cradle, the red LED on the cradle will also dim.
This is normal. When the device is charging, the battery level report in response texts won’t be accurate – it may show 100% battery even if the device is still charging.
Please remember that charging isn’t complete until the blue LED on the device itself is no longer constant. If using a charging cradle, the red LED on the cradle will also dim.
The GPS chip won’t be as able to retrieve an accurate location either – added to which the device is indoors anyway. For this reason, you are likely to get an old date/time stamp in location reports, when the device is charging.
On the default PS1 power saving mode, battery duration should be 3-4 days but will vary according to how much the device moves. Motion triggers the motion sensor, which is more energy draining. The Mode4 option (explained above) should give longer duration, but is only appropriate for certain needs (i.e. when not using geofencing or online tracking).
The battery level reporting won’t always be 100% accurate. Once in a while, and especially if it seems to be draining fast, let it discharge completely and then give a full recharge. This will recalibrate the battery level for accurate battery reporting in texts.
If you still think your battery is draining too fast, send Reset! to restore the device to factory default. You will need to re-enter any alert numbers, but this might help clear any erroneous functions that might happen to be draining the battery. Remember to send AGPS1 to activate assisted GPS as well, once you have reset the device.
Sometimes when customers report a non-response situation, its actually because the device is not on in the first place.
If it won’t power on, the most likely explanation is that the power is depleted, caused by a charging issue.
Here is what you should do, in order, to find out what the cause is.
Check its charging ok
When you plug the charging lead directly into the device, and the plug is on, does a blue LED light (constant) come on the device? You may have to wait a minute if the battery is completely flat.
If so, then its now charging, allow it to charge until the blue LED starts flashing – the battery is now charged. Text “status” or “loc” to see the battery level in the reply – it should be above 95%.
If the blue LED doesn’t come on – then keep investigating.
Check the plug
Try connecting the lead to the USB port of your computer instead, or another USB charging plug. Does the blue LED come on now? If so, then the plug you were using is faulty. If not, then keep investigating.
Check the charging method
If you have a charging cradle, then try that to charge the device instead. You should see a red light on the cradle when the device is charging. If you don’t have a charging cradle, then this option won’t be available. Instead, visually inspect the USB port on the device, to see if there are any signs of damage (e.g. if someone forced the lead in the wrong way).
Check the lead
The micro-USB lead isn’t specific to the device – they’re commonly used for other USB devices and many mobile phones. If you have a spare lead lying around, then test this instead. If the device now charges, then you know the original lead has developed a fault (this can happen if, for example, an office chair is rolled over it, or its tightly wound round a plug).
Hopefully you can find what the cause of the issue is. A fault may have developed within the plug, lead or charging cradle. If its the charging port on the device itself, and you don’t have a charging cradle, then buying one will rectify the problem (its an alternate, and more user-friendly way to charge the device).
Please click here to order a charging cradle. They are currently 12.50.
Please note, as you already have the charging plug and lead, ordering a charging cradle will only supply you with a charging cradle. If you are buying a second charging cradle to have as a second, separate charging station, you will need to purchase a USB plug and micro-USB lead separately.
If you’d like to order a second lead and plug, the cheapest/easiest option would be eBay or a local store where they’re readily available. Ensure that you get a micro-USB that matches the type that came with your device (its a standard cable).
When charging via the cradle or the USB lead, you should see a blue LED on the device. When fully charged, this light will flash as normal, or be off if it’s gone into standby mode.
If this light doesn’t come on, then text status to your device. If you see anything above 97% under battery level, then it is already be fully charged, which is why you are no longer seeing the constant blue LED.
If the battery level is low, or the device won’t even switch on but also won’t charge, then there’s a problem. In that scenario, go through these steps in turn, to help narrow down the cause.
Check the plug
Try connecting the lead to the USB port of your computer instead, or another USB charging plug. Does the blue LED come on now? If so, then the plug you were using is faulty. If not, then keep investigating.
Check the charging method
If you have a charging cradle, then try that to charge the device instead. You should see a red light on the cradle when the device is charging. If you don’t have a charging cradle, then this option won’t be available. Instead, visually inspect the USB port on the device, to see if there are any signs of damage (e.g. if someone forced the lead in the wrong way).
Check the lead
The micro-USB lead isn’t specific to the device – they’re commonly used for other USB devices and many mobile phones. If you have a spare lead lying around, then test this instead. If the device now charges, then you know the original lead has developed a fault (this can happen if, for example, an office chair is rolled over it, or its tightly wound round a plug).
Hopefully you can find what the cause of the issue is. A fault may have developed within the plug, lead or charging cradle. If its the charging port on the device itself, and you don’t have a charging cradle, then buying one will rectify the problem (its an alternate, and more user-friendly way to charge the device).
SIM Card Issues
You can check credit by logging into your SIM account.
The SIM you use shouldn’t have a PIN associated with it.
Please remember that the network you choose to use is a completely separate company from us. Any specific issues relating to the SIM card should be directed to them.
Tips and Tricks
Here’s an example of what you might receive in response to status, with what the figures mean. In the example, the functions are all on, if you see a 0 after the label then it means the function is switched off.
A1 The alerts & SOS number set via A1
A2 The alerts & SOS number set via A2
A3 The alerts & SOS number set via A3
A4 The alerts & SOS number set via A4
A5 The alerts & SOS number set via A5
Speed:0,100km/h A speed limit alert, set via speed1,100(km/h)
GEO:1,0,0,100M Geofence alert set via G1,1,0,100
VB:0,2H Vibration alert set via V1,02H (check every two hours for motion)
MV:M,100 Movement alert set via M1,100M (alert if move >100M)
LBS:0 Locate via cell tower set via CL1
LED:0 Switch off LEDs set via LED1
TZ:1.0 Time zone adjustment set via TZ+01 (forward an hour)
LI:0 Listen-in mode set via L1
PS:1 Power-saving (eco) mode set via PS1
DS:0,1H Deep sleep mode set via DS1,01H (alert for 1 hour if motion)
FL:0 Fall detection via FL1
Bat:78% Battery level (approx)
The location
Text LOC for a location. If you don’t get a location because of lack of GPS signal, you can text CL1 before texting LOC again – this will then give you a location based on the GSM (mobile network) base station. Cancel again with CL0.
That the wearer is wearing the tracker
Text V1,01M would check for motion every minute – and send an alert text to the numbers set in A1, B1 and C1. So when you get the alert text, you know that the Tracker is moving (i.e. being carried), and can cancel the function again with V0.
The sounds going on around the wearer
Text L1 to set the Tracker to answer automatically, discreetly, and without the speaker enabled. You will then be able to listen to the surroundings. This might be useful if you want to check on the wearers location. Cancel with L0.
That the wearer is ok
You can call the Tracker directly to have a two-way conversation. It will sound a calling jingle (so the wearer will know) before answering automatically. The wearer can hang up the call by pressing the SOS button, or the caller can hang up on their own phone.
There are a few ways to keep alerted if someone steals your vehicle, bag, expensive camera, bike – whatever it may be.
Shorter durations
This might be useful if you’re leaving your car in a worrisome place, or some camera bags at a wedding for example. Text V1,xxS/M/H where xx = time variable (two digits), S/M/H= seconds/minutes/hours. Texting V1,01M would check for motion every minute – and send an alert text to the numbers set in A1, B1 and C1. The shorter the time interval, the quicker the batteries will run out – so it all depends on how soon you want to be notified and what the thing is you’re worried about. If you had it set for one minute, and someone took your bag just after a check, that would give a full minute before you were able to read your alert notification text. So V1,20S might be better if you’re nearer to your stuff (checking every 20 seconds). To cancel, send V0.
Also, using the movement command (detailed in the manual) might be useful. This tells you if the Tracker moves a certain distance away. This won’t be as responsive or accurate as the motion detection though (above), as it keeps needing to locate itself rather than just relying on motion.
If you’re near to your device and are having difficulty locating it, remember you can call it. It will make a ringtone jingle before automatically answering – so listen out for the ringtone!
Longer durations (e.g. over a week)
The best way for a long duration is to use the deep sleep energy setting (detailed in the manual). This shuts off the ability to send/receive texts, until the tracker moves – then it wakes up for a set duration. If you put the Tracker somewhere static, then send the text to enter deep sleep mode, it will stop responding to your texts after a few minutes. Then, if you just text LOC, you won’t get a reply. But the next time the Tracker moves – it will wake up, get your reply, and then text you back. This should last for about a month – because the Tracker is in deep sleep mode until it moves. One word of caution – some networks will expire undelivered texts after a set time period. So you might want to periodically resend your location text to ensure its not unexpired. Another word of caution – bear in mind that you will not be able to send any more texts to your Tracker, until it wakes up from moving.
If you’re near to your device and are having difficulty locating it, remember you can call it. It will make a ringtone jingle before automatically answering – so listen out for the ringtone!
If you’re tracking someone with dementia, they may have a particular spot they wander too which is unsafe. If you know they’re there – then you can use the Geo-fencing command to set an alert for if the person returns to that area. Remember that the geo-fence command operates based on where the Tracker is when you set it. So if you send G1,1,1,100M, it will notify you if they return to within 100m of where they currently are. This is because the third ‘1’ is a one (meaning ‘to go into the geo-fence’) rather than a zero (meaning ‘to go out of the geo-fence’).
Share Your Story!
If you’ve used your GPS Tracker to find someone who has become lost, or maybe used it for something more unusual but still with a good story to tell, it would be great to hear about it. We get so bogged down in assisting with technical issues sometimes that its great to be reminded of their real world usefulness. So please feel free to share any stories using the form below. You don’t need to include the devices phone number of course, if you’re only sharing a story.
Still Stuck?
Explain your question or problem using the form below, and we’ll be in touch as soon as possible to help out. This form will let us know that your problem is related to this particular device, but please do mention its the 3G device. If you find something that you think would be useful to be addressed on this page for other customers, then please let us know so we can add it.