This process requires:
- A small screwdriver
- A cocktail stick or toothpick
- A fairly steady hand
We tend to install SIM’s in all the UK devices even if people don’t order them at checkout. Why? Because its more often the case that customers forget to add them, rather than genuinely not wanting one. Installing one anyway saves the hassle of having to correct this later.
For customers who genuinely want to use their own – its no problem at all to just remove the existing SIM when installing your own. Just throw the old one away! Its best to have one and not need it, than need one and not have it.
 SIM requirements:
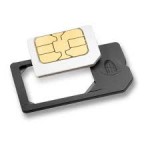
- Must be a nano-sim (these are often nested inside of standard SIMs)
- You can use any UK network except "Three".
- Can’t have a PIN number. If it does, remove it first by installing it in a handset.
- Needs to have good network coverage for the area in which it will be used. Check this with your chosen network provider. Most have a function on their website where you can look up the coverage for a particular area.
Please read through the following carefully before starting, so you know what you're doing!
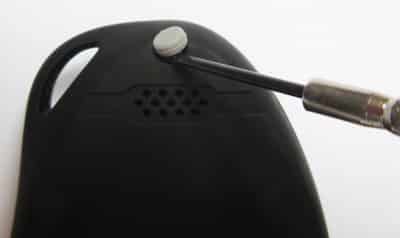
- Remove the rubber bungs, using a cocktail stick, toothpick, tiny flat screwdriver head (the kind you might fix spectacles with) or something similar. The bungs are not “fixed” to the device, they will fall out when prized – so be careful not to lose them.
- You can then remove the screws, and carefully separate the two halves of the device.
Be careful of the joining battery wires!
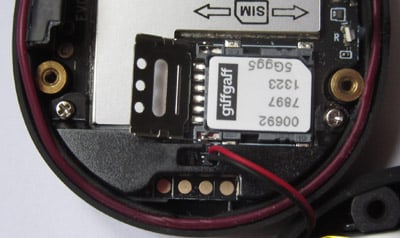
- Gently click the metal SIM clasp to the left before opening it outwards.
If there is an old/existing SIM, you can now remove it.


- Place your new nano-SIM as pictured. It doesn’t “click” into place, it just sits in the shaped surrounding area, so you will need to keep it steady.
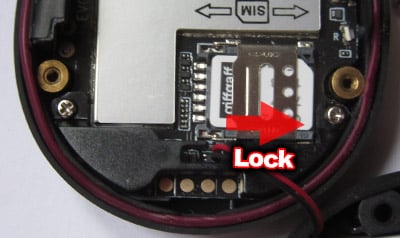
- Push the metal clasp back down, and then click it slightly to the right to lock it into place. If the SIM moves even slightly before you do this, then it won’t close properly. Make sure it's secure.
Then close the two-halves again.
Be careful that the thin water-proofing seal is in place around the edge, and adjust if necessary.
Carefully screw it together again (don't over-tighten), and push the rubber bungs back.
If you feel uncomfortable with any of this process, get in touch and we can arrange to do it for you. This will of course require you to mail the device back to us.